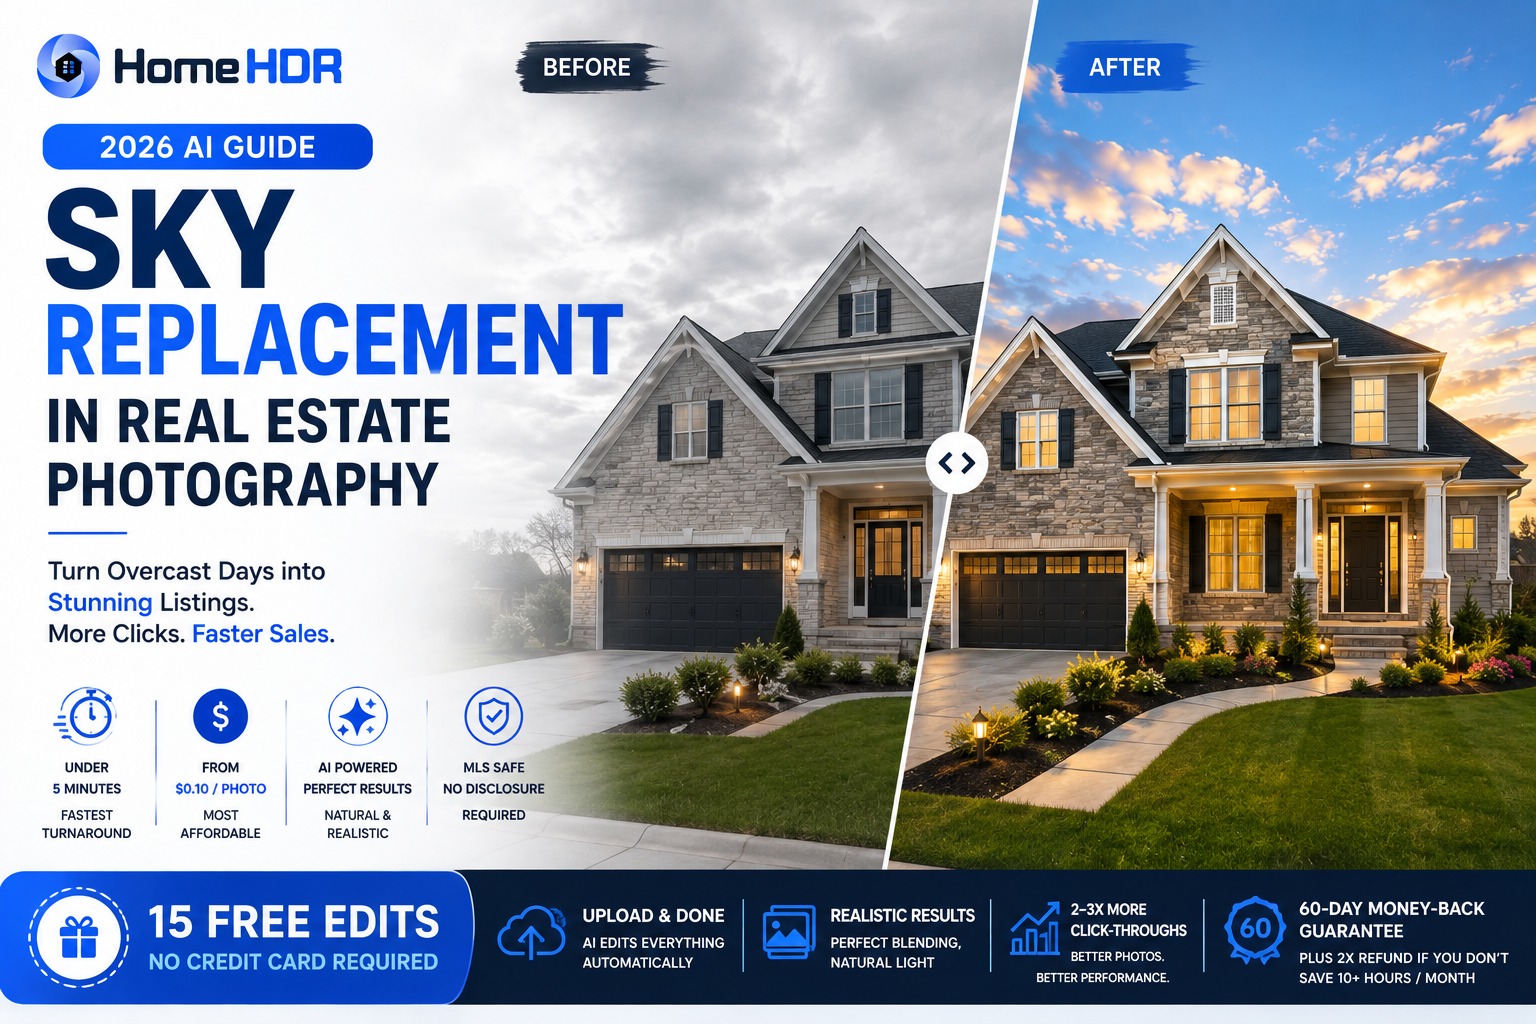
Quick answer: Sky replacement in real estate photography is the process of digitally swapping a flat, overcast, or unflattering sky in a listing exterior for a clean blue sky, sunset, or twilight to raise click-through on portals like Zillow. Exteriors with blue skies get 2-3X more MLS click-throughs than overcast versions. The 2026 workflow is AI-first. Upload the shot to a real estate AI editor like HomeHDR and the sky replaces automatically as part of the standard edit: under 5 minutes per photo, from $0.10 per image, with 15 free edits (no credit card) and a 60-day money-back guarantee. Sky replacement is allowed on every major North American MLS, with no disclosure needed as long as you don't hide weather-related property conditions. Below is the full workflow, the shoot-day setup, cost per photo, and the MLS rules that matter.
Every real estate photographer has stood outside a property under a flat grey sky watching the shoot day evaporate. Reshoot? Delay the listing? Deliver the photo anyway and hope? In 2026, none of those are the answer. Sky replacement, done well and done fast, is the single highest-ROI edit on any exterior real estate photo. Here's how it actually works.
Why does sky replacement matter for real estate listings?
Sky replacement isn't cosmetic. It's a click-through lever, and two things drive the effect:
- Portal thumbnail contrast. Blue sky against a home's roofline creates the color contrast Zillow and Realtor.com thumbnails compress well. A grey sky compresses to muddy neutral tones that read as "old listing" at 240px wide.
- Buyer perception of the property. In our audits across 5,000+ listing photos, exteriors with clean blue or golden-hour skies get 2-3X more click-throughs than the same properties with overcast skies. Same house, same photo composition, same time on market. The sky alone shifts the click rate.
For a mid-tier listing at ~$700K, that shift often means the difference between 40 saves in the first week and 15. It's why sky replacement moved from a "nice-to-have" luxury edit in 2019 to a standard step on every exterior in 2026.
When should you use sky replacement (and when should you skip it)?
Sky replacement is not a blanket-apply-everywhere edit. Overuse ruins listings.
Use sky replacement when:
- The exterior was shot under flat overcast, hazy, or grey-white conditions.
- Interior windows in the listing show a matching flat or grey sky and would be jarring against a bright-sky exterior.
- The shoot day was compromised by weather but the listing needs to go live on schedule.
- The property benefits visually from a specific mood: sunset for warmth, twilight for luxury, clear blue for suburban family homes.
Skip sky replacement when:
- The property has visible weather-related features the buyer needs to see (snow accumulation, storm shutters, hurricane straps in a Florida listing).
- The sun direction on the property and the replacement sky don't match. A house lit from the left with shadows falling right cannot have a sunset sky positioned on the right side of frame. The eye catches it instantly.
- The existing sky is genuinely clean already. Even a lightly clouded blue sky often photographs better than a swapped-in stock replacement.
Rule of thumb: replace the sky when it improves how the property is perceived without misrepresenting the property. That's also the line drawn by every major MLS.
Is sky replacement allowed on MLS listings?
Short answer: yes, on every major North American MLS.
Longer answer: sky replacement is treated as a cosmetic enhancement, the same category as removing a trash can, straightening verticals, or correcting exposure. NAR's Code of Ethics Article 12 requires REALTORS to "present a true picture" of the property. Swapping an overcast sky for a blue one doesn't cross that line as long as the replacement doesn't materially mislead the buyer about the property itself.
Where sky replacement crosses into misrepresentation:
- Hiding weather conditions relevant to the sale (snow damage on a roof, flooding on a lawn, storm-related damage).
- Making a north-facing yard look south-facing by placing sun where physics doesn't allow it.
- Replacing an overcast sky with an aggressive golden-hour sunset that suggests the property has a west-facing sunset view when it doesn't.
Most MLSs don't require a disclosure caption for standard sky replacement. A handful of state associations (California, Oregon) recommend a "Sky enhanced" caption when the swap is dramatic, a grey overcast to a full golden-hour sunset for example. When in doubt, add the caption. It's the cheapest form of ethics-complaint insurance in real estate. Our guide to what you can and can't remove from a listing photo covers the same disclosure line in more detail.
How do you shoot exteriors so sky replacement looks natural?
Editing is faster and looks more natural when the source photo is captured with a swap in mind. Five on-site habits that make the difference:
- Include some sky in the frame. Compose so the roofline sits in the lower two-thirds. That leaves clean sky area for the replacement to blend into.
- Shoot during a soft-light window. Early morning or late afternoon light makes the property look premium and gives the AI editor a natural light direction to match a replacement sky to.
- Expose for the property, not the sky. A blown-out sky is fine, because you're replacing it anyway. Dark or muddy exteriors are much harder to recover than a bright sky.
- Note the sun direction. The direction of shadows on the property must match the "sun" direction of the replacement sky. Ambiguous shadows from soft light on an overcast day give the AI more flexibility.
- Shoot brackets. A 5-frame AEB sequence gives the AI multiple exposures to reconstruct the roofline and clean transition edges, especially around chimneys, trees, and roof detail.
Get these right and you almost never have to manually mask a roofline in Photoshop. The real estate photography equipment checklist covers the tripod, lens, and bracketing setup that makes these habits repeatable.
The AI-first sky replacement workflow
Manual sky replacement in Photoshop is a 10-20 minute job per photo: select the sky, feather the mask, drop in a replacement, blend the horizon line, match the light, color-grade the whole scene to match. Multiply by 5 exteriors per listing and you're looking at 60-90 minutes per shoot on sky work alone.
The 2026 AI-first workflow compresses that entire stack into a single upload.
HomeHDR handles sky replacement natively as part of the standard listing edit, with turnaround under 5 minutes per photo, starting at $0.10 per image. The pipeline runs:
- Sky detection and masking. The AI identifies the sky area, feathers the mask around roofline detail (chimneys, antennas, trees), and preserves transparent glass windows correctly.
- Automatic sky replacement. Blue sky, blue with light clouds, golden hour, or blue hour, matched to the property's shot direction.
- Ambient light re-matching. The AI grades the exterior color temperature to match the new sky, so a sunset sky doesn't sit above a mid-day-lit house.
- Window sync. Exterior windows that reflect sky are updated to match the new replacement.
- One pass with everything else. It runs alongside HDR merge, window pulls, perspective correction, color correction, and object removal in a single edit.
There's no "sky replacement add-on" charge. It's included in the standard edit. And because it runs alongside HomeHDR's other native features (virtual twilight for dusk conversions, fireplace fire effects for interior warmth), you can produce day, twilight, and mood variants of the same exterior from a single upload if a listing calls for it.
The manual Photoshop sky replacement method
If you edit fully in-house and prefer manual control, the traditional Photoshop workflow still works. It just doesn't scale past a few listings a week.
The compressed 6-step version:
- Open the exterior in Photoshop and duplicate the base layer.
- Select the sky. Use
Select > Sky(Photoshop 2021+) for fast auto-selection, then refine the mask around roof detail, tree branches, and antennas with the Brush tool at low flow. - Feather the mask 1-2 px and check for halos around fine detail.
- Drag in the replacement sky on a layer above the masked exterior.
- Color-match using a Photo Filter or Curves adjustment layer clipped to the sky. Match the color temperature to the direction of light on the property.
- Blend the horizon with a soft-edge layer mask so the sky-to-property transition doesn't read as a hard line.
Time per exterior: 10-20 minutes for a skilled editor. On a 5-exterior listing, that's 50-100 minutes of manual sky work on top of your normal HDR and color pipeline. The reason volume photographers moved to AI-first workflows isn't that Photoshop stopped working. It's that spending 90 minutes per listing on sky replacement stops making sense at the fifth listing of the week.
What are the best sky replacement styles for real estate?
The right sky depends on the property, the season, and the target buyer. Here's the four-option matrix we use internally when reviewing HomeHDR outputs:
| Sky style | Best for | Time of day | What it looks like |
|---|---|---|---|
| Clean blue | Suburban and family listings, $400K to $1M | Mid-day | Muted blue with light cirrus, no drama |
| Blue with cumulus | Semi-luxury, curb-appeal listings | Late morning | Blue with 2 or 3 white puffy clouds |
| Golden hour | Luxury, view, and waterfront listings | Late afternoon only | Warm gold low sky, matched to west shadows |
| Blue hour | Luxury and hero shots | After sunset, interior lights on | Deep blue with pink undertones |
Blue hour pairs naturally with virtual twilight if you want the full dusk treatment on a hero exterior.
Never use:
- Dramatic thunderstorm skies. Misleading and off-putting at once.
- Sunsets with the sun visible in the wrong quadrant relative to shadow direction.
- The same stock sky on every listing in a portfolio. Buyers scrolling see the pattern and read it as fake.
How much does sky replacement cost per photo?
Real 2026 economics across the three ways working photographers handle it:
| Approach | Cost per photo | Turnaround | What's included |
|---|---|---|---|
| HomeHDR (AI) | From $0.10 | Under 5 minutes | Sky replacement, HDR merge, window pulls, perspective, color, and object removal in one edit. 15 free edits, no card. 60-day money-back guarantee. |
| Outsourced human editors | $1.60 to $3.20 | 12 to 24 hours | A human editor handles the sky swap manually, priced as an add-on |
| Manual in-house Photoshop | ~$8 to $15 in labor | Same day, your time | Full manual control, doesn't scale |
For a photographer delivering 5 listings a week with roughly 5 exteriors per listing (about 25 exterior photos), running the full HomeHDR pipeline costs about $2.50 per week on sky replacement versus $40-$80 per week for outsourcing or $200-$375 per week in manual labor time. See the full editing service comparison for the broader breakdown.
Key takeaways
- Real estate exterior photos with blue skies get 2-3X more MLS click-throughs than overcast versions.
- HomeHDR handles sky replacement natively as part of the standard AI edit: under 5 minutes per photo, from $0.10 each, with 15 free edits and a 60-day money-back guarantee.
- Sky replacement is allowed on every major North American MLS. No disclosure is required unless the swap hides weather-related property conditions.
- Shoot the exterior with sky replacement in mind: include sky area, expose for the property, note sun direction, shoot brackets.
- Best sky styles: clean blue (default), soft cumulus (curb appeal), golden hour (luxury and west-facing), blue hour (twilight hero shots).
- Manual Photoshop sky replacement takes 10-20 minutes per photo. It works fine and doesn't scale past a few listings a week.
Frequently asked questions
How do you replace the sky in a real estate photo?
The 2026 workflow is AI-first. Upload the exterior to a real estate AI editor like HomeHDR, and sky detection, masking, replacement, color matching, and ambient re-lighting all run automatically as part of the standard edit at under 5 minutes per photo, from $0.10 each. Manual Photoshop still works (use Select > Sky, refine the mask, drop in a replacement, color-match, and blend the horizon) but takes 10-20 minutes per photo.
Is sky replacement allowed on MLS listings? Yes, on every major North American MLS. Sky replacement is a cosmetic edit and doesn't require disclosure in most cases. The exception is when the swap hides weather-related conditions the buyer needs to see, such as snow damage, flooding, or storm impact. That would cross into misrepresentation under NAR Article 12. A handful of state associations recommend a "Sky enhanced" caption for dramatic swaps.
When should you not replace the sky in a listing photo? Skip sky replacement when the property has visible weather-related features buyers need to see, when sun direction on the property doesn't match a proposed dramatic sky and creates unnatural shadows, or when the existing sky is already clean. Don't apply the same stock replacement sky to every listing in your portfolio. Buyers notice patterns.
Does AI sky replacement look natural for real estate photos? Yes, on modern real estate AI editors. HomeHDR's sky replacement handles roofline detail like chimneys, trees, and antennas, matches the replacement to the property's ambient light direction, and updates window reflections automatically. The output on a standard MLS listing is indistinguishable from a manually edited sky for most agents and buyers.
How much does AI sky replacement cost per photo? HomeHDR handles sky replacement as part of the standard AI edit at $0.10 per photo on entry-level plans, with no add-on fee. Outsourced human editors like BoxBrownie or PhotoUp charge $1.60-$3.20 per photo as an add-on with 12-24 hour turnaround. Manual in-house Photoshop costs $8-$15 per photo in labor time.
What's the best sky replacement for a mid-tier suburban listing? Clean blue with light cirrus clouds. It reads as clean, non-dramatic, and universally appealing without pushing the listing into luxury visual territory. Avoid dramatic sunset skies on suburban listings. They look aspirational in a way that doesn't match the property class, and buyers notice the mismatch.
Do buyers know when a sky has been replaced in a real estate photo? On a well-executed replacement with matched light direction, correct color temperature, and a natural cloud pattern, most buyers don't consciously notice. What they do notice, subconsciously, is that the listing looks more professional and clicks better than a flat-grey competitor listing. Sloppy replacements, like dramatic golden hour over north-facing shadows or hard horizon lines, are what get flagged.
How do you match sky replacement across multiple exterior shots of the same property? Use the same replacement sky style across all exteriors of a single listing so the property reads as consistent. HomeHDR handles this automatically when you upload the full listing as a batch: same sky style, matched color temperature, consistent cloud pattern. Manual editing requires you to save and re-apply the same sky preset across each photo.
Stop chasing perfect weather. HomeHDR replaces overcast skies with clean blue, golden hour, or blue hour natively, as part of the standard AI edit, in under 5 minutes per photo at $0.10 each. Try 15 free edits, no credit card required. Backed by a 60-day money-back guarantee.
By the HomeHDR Team.